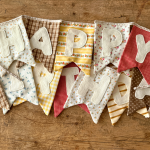

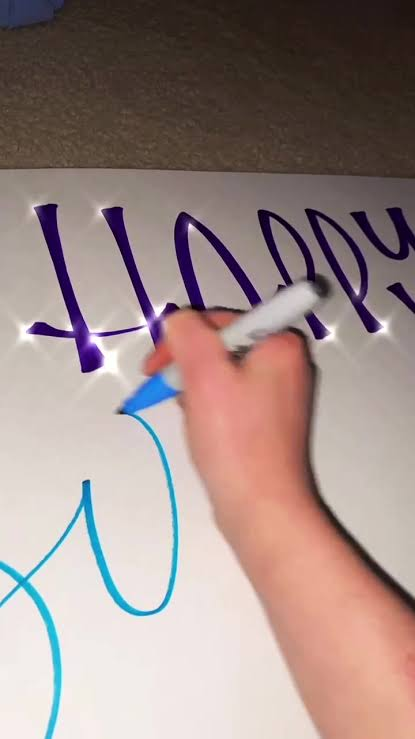
A handmade birthday banner can make any celebration feel more personal and colorful. Using birthday bubble lettering is an easy way to create large, cheerful words that instantly grab attention. You can customize the letters, colors, decorations, and banner shape to match the birthday theme.
Why Make a DIY Birthday Banner?
Store-bought banners are convenient, but handmade banners give you more creative freedom. You can choose the exact message, letter size, colors, and materials you want.
Bold hand lettering also makes simple materials look much more interesting. Even basic cardstock can become an attractive party decoration when you add large letters and small artistic details.
Choose a Simple Birthday Message
Start by deciding what you want your banner to say. “Happy Birthday” is the classic choice, but you can make the message more personal by adding the person’s name.
Short messages usually work best because each letter needs enough space to stand out. You could use phrases such as “Let’s Party,” “Make a Wish,” or “Best Day Ever” for something different.
Create Large Bubble Letters
Bubble letters work especially well on birthday banners because they are thick, rounded, and easy to decorate. Draw each letter lightly with a pencil before creating the final outline.
Keep the letters similar in height and width to give your banner a balanced appearance. Once you like the shapes, trace the outlines with a bold marker and erase any visible pencil lines.
Use Bright and Contrasting Colors
Colors can completely change the mood of your birthday banner. Bright shades create a playful look, while soft pastel colors work well for a calm and cute party theme.
Try creating contrast between the letters and background. For example, dark lettering on light cardstock makes the words easier to read from across the room.
Add Shadows to Bold Hand Lettering
A simple shadow can make flat letters appear more dimensional. Draw a second line along the right or lower side of every letter to create this effect.
You can fill the shadow with a darker shade of the main letter color. Keep the shadow direction consistent across all letters so the design looks neat.
Experiment With Creative Alphabet Designs
You do not need to use exactly the same lettering style for every birthday banner. Exploring creative alphabet styles can help you create letters that match different themes, ages, and personalities.
For example, rounded letters suit children’s parties, while tall block letters can create a modern appearance. You can also combine uppercase and lowercase characters carefully to give the banner a more relaxed handmade style.
Decorate Inside the Letters
Large letters provide plenty of room for patterns and illustrations. Instead of using one solid color, fill the letters with dots, stripes, stars, hearts, flowers, or small birthday icons.
You could even give every letter a slightly different design while keeping the same overall color palette. This approach creates variety without making the banner look messy.
Match the Lettering to the Birthday Theme
Think about the party theme before choosing your lettering details. A space-themed birthday could feature dark letters decorated with planets, stars, and tiny rockets.
For a princess theme, you might use pink or purple lettering with crowns and sparkles. Animal, superhero, sports, rainbow, and gaming themes can also inspire unique letter decorations.
Make Individual Letter Cards
Instead of writing the entire message on one long sheet, create one card for each letter. Cut squares, circles, triangles, or flag shapes from cardstock.
Draw one bold letter in the center of every piece. You can then connect the cards with ribbon, string, or colorful yarn to create a flexible banner.
Try a Layered Paper Effect
Layering paper is another simple way to make hand lettering stand out. Cut the main letter from colored paper and attach it to a slightly larger shape in another color.
This creates an instant outline around the letter. You can repeat the process with another layer if you want an even bolder design.
Add Small Birthday Illustrations
Hand lettering does not have to be the only feature on your banner. Small illustrations can fill empty areas and make the decoration feel more festive.
Draw balloons, birthday cakes, candles, gifts, party hats, confetti, or stars around the words. Keep these illustrations smaller than the lettering so the birthday message remains the main focus.
Use Glitter and Metallic Details
A little sparkle can transform a simple DIY banner. Add glitter glue to selected parts of your letters or use metallic markers to create shiny outlines.
Avoid covering every section with glitter. Small highlights usually look cleaner and allow your bold hand lettering to remain easy to read.
Create a Rainbow Letter Banner
A rainbow design works well for colorful birthday celebrations. Give every letter a different color or divide each letter into several colorful sections.
You can also use the same sequence of colors repeatedly across the banner. Adding small clouds, stars, or colorful dots can complete the cheerful design.
Keep Letter Spacing Consistent
Good spacing makes handmade banners easier to read. Leave a similar amount of space between every letter and word.
Before attaching anything permanently, arrange all your letter cards on a table or floor. This lets you check the order, spacing, colors, and overall balance before hanging the banner.
Final Thoughts
DIY birthday banners are a simple way to turn hand lettering into memorable party decorations. Bold letters, colorful patterns, paper layers, shadows, and creative alphabet styles give you plenty of ways to personalize each design.
You do not need advanced drawing skills or expensive craft supplies. With paper, markers, scissors, and a little imagination, you can create a bold birthday banner that becomes part of the celebration itself.